09.) PAPERCRAFT OBJECTS: FINAL REVISION
Phil, the Final Stage
(And what a performance it was)

Planning, post feedback:
I began to think of different things or features that I could add to my original design to make Phil more identifiable as an individual character. The idea that I ended up settling on or wanting to work on the most, was giving him legs. I went through and thought of different ways they would sit or stand and how they would connect to the body. Originally, thinking of creating the shape to mold into or fit around the pill bottle body.


Once I had created this file and saved it to a thumb drive I went to my appointment at the think tank to use the laser cutter, where I was able to cut and score my designs into the colour of card-stock and Mayfair paper that I had designated.


Beginning again:
I began fresh in Rhino, equips with my feedback and a couple more ideas to add to my design. I first began with recreating the original design of the pill pot, then began to trouble shoot what Phil’s legs would look like. To do that I began with a poly line and began to draw leg shapes until I was happy with one, then extruded the shape into a 3D form.
From here I began to unfold each of the shapes into nets. The legs proved to be more difficult, as it was hard for me to see how exactly they could reform after they were flattened. However, the rest of it was fairly simple.
After unfolding and separating each shape, I went through using the text feature to label them, so that it would be easier to identify them when it come to laser cutting. I found that it made the process easier as I used multiple colours for the different features, i.e. the legs, bottle, lid and face.
I then began to create the tabs on all of the edges I would need to glue. Taking into account some of my feedback surrounding the design of the cap, I also edited the design of where the tabs were, along with the location of the cut and score lines. I then began to separate each shape into its respective piece of paper.
Renderings:


Laser cutting and construction:


After cutting my designs, I ran into some problems surrounding the actual construction of the object. Most notably in the cap, I was unable to cleanly connect both the top and bottom of the cap, as the sides that would fold around it to make the cylinder were too small, and the tabs too big. I decided to cut and a couple features by hand to correct these mistakes; including internal supports, to both in-force the structure and close the gaps, as well as another panel to close the sides. 


Another place I ran into design flaws was in the construction of the legs and feet. I noticed as I was folding, one of the planes that should have been the top of the foot was not where it should be. I instead folded it in and used as a larger tab. Despite this mistake I think it is one of my most successful pieces in the final product.
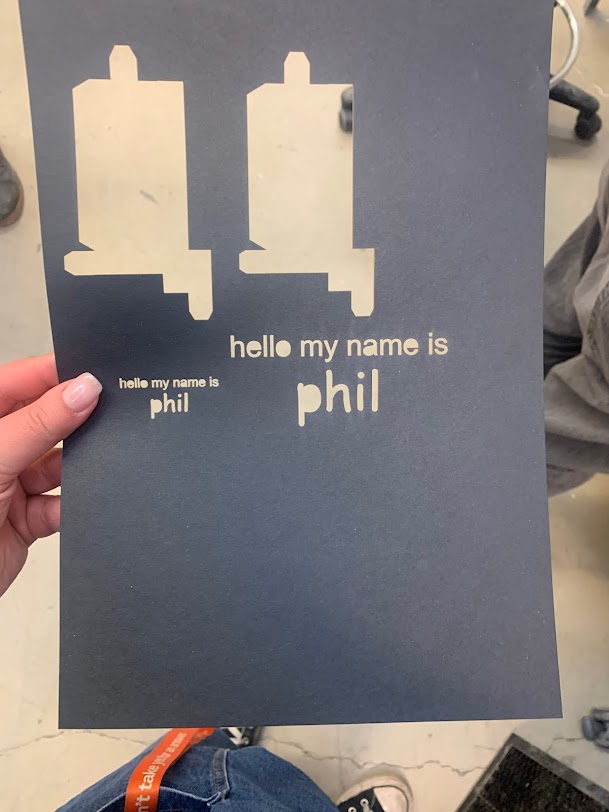
I also ran into some issues surrounding my idea to create a name or label for Phil, originally I had wanted to give him a “hello my name is” greeting name tag, however, when working with the cutter I quickly realized how impossible it would be to create letters that small and instead opted to enlarge the phrase and use it in a speech bubble instead.

Comments
Post a Comment